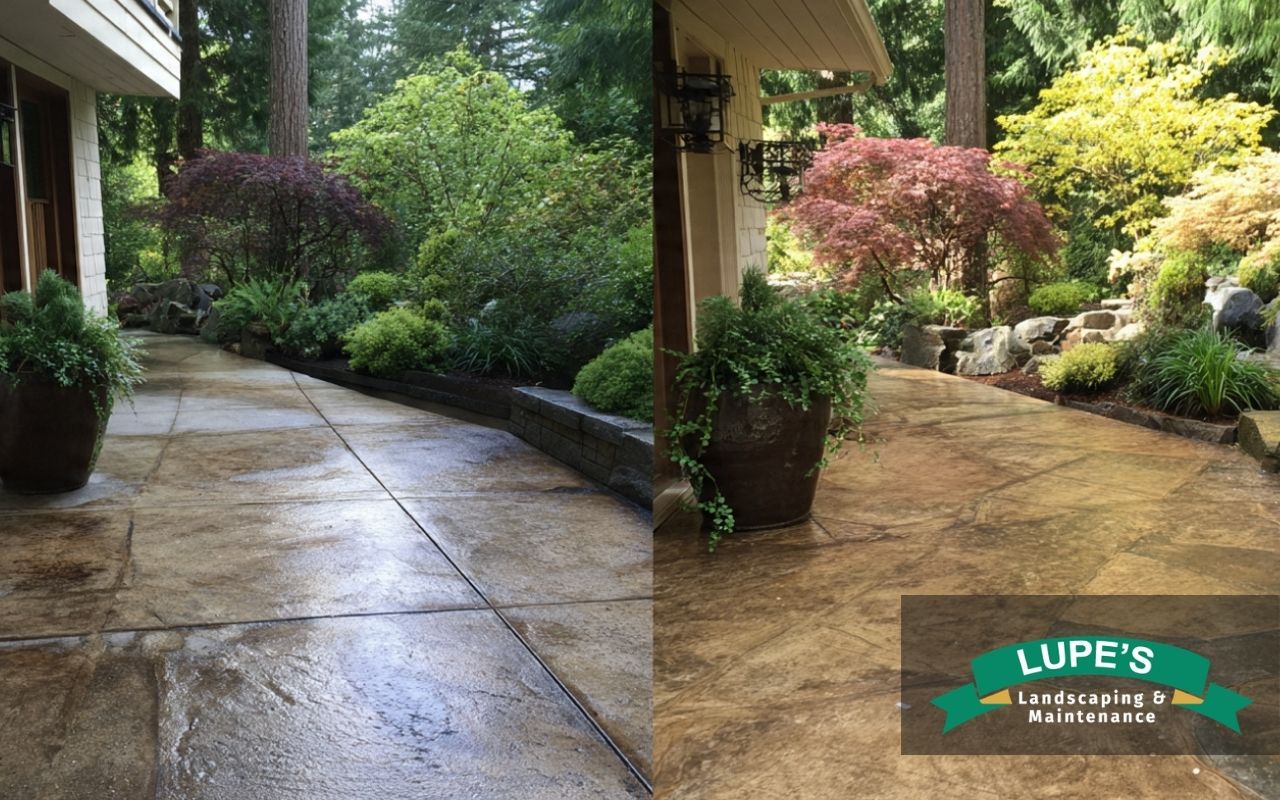
Picture walking into your backyard and seeing a worn patio. Cracks show, and the finish looks faded. On Bainbridge Island, damp air can speed up wear. Still, you do not need a full tear-out. Concrete patio resurfacing for Bainbridge Island can renew the surface with less mess.
In this guide, you will learn crack repair basics, decorative finishes, slip-resistant textures, and sealing tips. As a result, your patio can look better and feel safer. Whether you host friends or relax alone, Concrete patio resurfacing for Bainbridge Island can help you enjoy the space again.
What concrete patio resurfacing means
Instead of removing the slab, resurfacing adds a thin layer on top of existing concrete. Often, it uses a cement mix with added binders or a very thin topping. Because of that, it saves time and reduces waste. Concrete patio resurfacing for Bainbridge Island also helps the slab handle moisture and coastal air.
Additionally, resurfacing gives more design options. You can choose smooth looks or more texture. You can also add color that fits your home style. When prep and curing are done right, the new surface can last through Northwest weather.
Check your patio before you start
First, look for hairline cracks, chipped spots, and uneven areas. Also, notice where water sits after rain. If drainage is poor, fix grading or downspout flow first. Otherwise, moisture may keep causing damage later.
Next, try a simple bond test. Apply a small patch of overlay and let it cure. Then press and scrape it gently. If it holds well, resurfacing is a good option. However, deep cracks or settling may need bigger repairs first.
- Inspect cracks, chips, and worn zones
- Check for pooling water and damp areas
- Test bonding with a small cured patch
- Fix structural movement before overlay work
Pick the best resurfacing material
When choosing materials, focus on strength, look, and work time. Basic cement overlays can work well for many patios. Meanwhile, polymer mixes can grip better and handle wet cycles. Very thin toppings can give a clean, modern look, while still taking color well.
For small DIY jobs, premixed kits can be easier. For larger projects, a custom mix can match your goals. Also, use sun-safe pigments to reduce fading. Finally, pair your overlay with the right sealer for better results.
- Cement overlay for simple refresh projects
- Polymer mix for stronger bond in wet areas
- Thin topping for a sleek, smooth finish
- Sun-safe color to help reduce fading
Prepare the surface the right way
Good prep helps the new layer stick. Start by sweeping and washing the slab well. Then remove stains with a gentle cleaner. If there is oil or grease, use a concrete cleaner made for that job. Afterward, rinse until no residue remains.
Next, open the surface so the overlay can grip. You can do this with a safe etching gel or light grinding. Then remove dust with a vacuum or blower. Most importantly, let the slab dry fully. Otherwise, trapped moisture can cause bubbles later.
Crack repair basics that prevent future problems
Before overlay work, fix damage so the surface stays even. For fine cracks, widen them into a small V-shape. Then brush and blow out dust. After that, fill the crack with the right repair product. This step supports a stronger finish in wet climates.
For small cracks, flexible repair fillers can help seal gaps. For larger cracks and chips, use a patch mix and smooth the edges. Then let repairs cure fully. Finally, apply a bonding layer over repairs. In the end, crack repair basics give the overlay a stable base.
Decorative finishes that change the whole look
Once the surface is sound, style choices can make it stand out. You can mix color into the overlay so wear is less visible. Or, you can add stains that create soft color variation. Either way, test a small spot first. Then adjust color before doing the full slab.
If you want patterns, stamped overlays and stencils can mimic stone or wood. After imprinting, protect the detail with a sealer. For more ideas, explore helpful guides on stamped concrete patios. Also, review planning steps in these concrete patio construction tips.
- Integral color for a consistent tone
- Stains for natural, varied shading
- Stamped patterns for stone-like texture
- Stencils for clean, repeatable designs
Slip-resistant textures for safer outdoor living
Safety matters, especially in wet seasons. Slip-resistant textures can reduce falls while keeping the patio comfortable. For example, fine grit can be blended into the overlay for light traction. Also, a broom finish can create small ridges that help water move away.
If you use decorative patterns, you can still add grip. Broadcast grit into the top coat of sealer to improve traction. Choose a fine grit so patterns stay clear. With slip-resistant textures, the patio can stay inviting even when it is damp.
Sealing tips to protect your new surface
A sealer helps guard against stains, water, and sun wear. Some sealers add light shine, while others look more natural. For busy patios, stronger sealers can handle more foot traffic. However, always check cure times and weather limits before you apply.
Apply thin, even coats and avoid puddles. Then let each coat dry before the next one. Also, keep pets and furniture off the surface until it cures. For more guidance, read this resource on sealing concrete. With smart sealing tips, Concrete patio resurfacing for Bainbridge Island can stay cleaner and last longer.
Maintenance steps that keep the patio looking new
After the refresh, simple care goes a long way. Sweep often, and rinse when needed. Also, clean spills fast with mild soap. Avoid harsh cleaners that can wear down sealers. Then check for small cracks each season and repair them early.
Plan to reseal every few years, depending on use and weather. In winter, remove standing water when possible. Also, use plastic tools to protect the surface. As a result, Concrete patio resurfacing for Bainbridge Island can keep its look for years.
Frequently Asked Questions
How long does resurfacing usually last?
With good prep and sealing, many overlays last for years. Still, weather and traffic can change the timeline.
Can I resurface over small cracks?
Yes, but you should fix them first. Otherwise, cracks can show through the new layer over time.
Which finish is easiest to keep clean?
Smooth finishes wipe down faster. However, light texture can hide small scuffs better in daily use.
Do I need a slip-resistant surface in Bainbridge Island?
Often, yes. Because rain and damp air are common, added grip can make outdoor areas safer.
When is the best time of year to do this work?
Dry, mild days are best. Also, avoid heavy rain windows so the overlay and sealer can cure well.
Enjoy your updated outdoor space
After the work, your patio can feel like new again. You can host dinners, relax outside, and walk safely. With smart design and care, Concrete patio resurfacing for Bainbridge Island can improve comfort and curb appeal. When you want local help, reach out to Lupe’s Landscaping & Maintenance through the contact page.
Most of all, keep the surface protected with routine cleaning and timely resealing. That way, Concrete patio resurfacing for Bainbridge Island remains a strong upgrade you can enjoy season after season.